If you've been reading for a while,
you know that I've been working on my home office/craft room.

After organizing the craft supplies a while back, it was on to the next project.


This room faces west, and although it's partially shaded by the roof of our front porch,
the afternoon sun can be overwhelming some days.
It needs a window treatment.
The fabric I planned to use was the end of a roll -
three precious metres!

I searched for a way to make it work back in this post,
and you all encouraged me to make roman blinds,
thank you!

I looked into Martha's instructions for sewing Roman Blinds,
and although they would have been perfect,
it began to seem a bit daunting
(her projects are always done properly and always have a million steps, don't they?)
I admit it, I was looking for they easy way out!
Jennifer from Rambling Renovators had suggested roller blinds..hmmm..
using roller blinds and laminating my fabric on top,
a la Design Sponge, seemed simple enough and I liked the clean look.
A little research, however, revealed that the narrow width of the windows
would have required custom roller blinds to the tune of $60 each.
Onward.
Amanda of {Re}Cycled Cosign and Design had mentioned mini-blinds diys,
so the googling began.
Found the Little Green Notebook tutorial, which seemed to be the original,
and has spawned heaps of copycats.
That must mean it works, right?
Off to the store to buy mini blinds for $1.80 each (how do they manufacture them for this price?)
and fabric glue, which I have never used before, being a sewer.
All set to begin cutting, I realized each blind needed to be 21" wide,
and my pattern repeat was only 17", and the print would not be centred.
So what, you say?
This is the window that I look at every day as I work at my desk,
and I knew that would drive me bananas...
(trying to overcome mytype-a tendencies!)
so off to the fabric store to buy navy linen,
which was going to serve as a liner and border,
which, as a bonus, also meant these would hold up to the sun a bit longer.
Now, the original tutorial is super-easy -
but of course I made it more complicated with this lining/border business..
I measured the window, adding 8" to the width
(3" for each border, 2" for seam allowance)
and 5" to the length
(3" for the bottom border, 2" for seam allowance).
Cut the navy linen fabric,
using a framing square and chalk to make sure everything was cut straight
(there's that type-a again :)
Then cut the suzani fabric,
17" wide (pattern repeat) and the length of the window.
Ironed all the seams into place,
using a guide cut to the border width,
and mitring the corners.
This took the longest of any step, but DON'T skip ironing,
this is how you get that crisp finish that makes your finished product looks professionally made.
Placed the patterned fabric inside and sewed them up.
The Little Green Notebook tutorial has all the additional steps,
which involve removing the majority of the slats from a set of miniblinds,
and literally gluing the remaining few to the back of the fabric.
Because I used two layers of fabric, there was A LOT of glue used,
so that it not only adhered the mini blind slats to the fabric but also to each other,
ensuring they would hang properly.
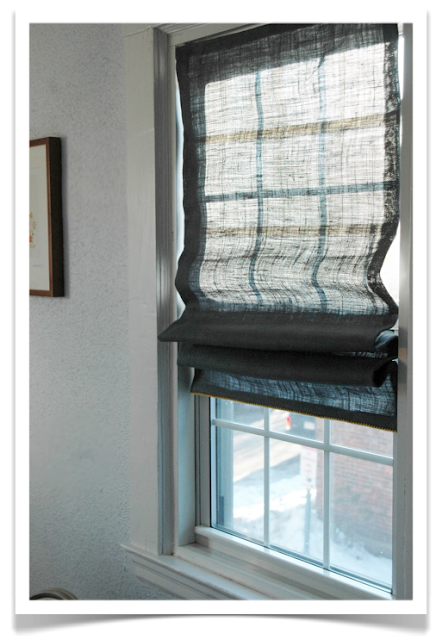
They dried for a day and, voila -
Perfect little spot for sewing now, isn't it?
This is a great method to create some more attractive window treatments
if you already have those dreaded miniblinds in place.
I know that the sun will take it's toll on these and I will be replacing them every few years,
so I didn't mind doing it the easy way -
but if you are making roman blinds to last a long time,
I would say bite the bullet and use Martha's method.1 project down, 3789 more to go :)
next I'll be tackling a desk update, and a really cool wall display...
Hope you all have a wonderful weekend,
and please pop over to Project Gadabout for my
Glamorous Gadabouts bits.
I can never get over how gorgeous Poppy's blog is!
Yesterday she created a fantastic post with my
Secret Cheese Fondue recipe
(D. and I are fondue junkies! Even the kids get into it now, lol)
So many people have tried to get that recipe from me over the years,
and it's yours for the taking!


No comments:
Post a Comment